Introduction
The Extended Location plugin enhances the location management capabilities for listings in the Listify and Jobify themes. This feature is essential for users who want to accurately set up listing locations either as an admin on the backend or as a listing owner through the frontend submission process. By enabling Extended Location, users can display maps, suggest locations, and improve location-based search functionality.
This guide provides step-by-step instructions on how to enable and configure the Extended Location plugin, as well as how to utilize it for adding locations to listings.
Installing the Extended Location Plugin
To enable the Extended Location feature, you must first obtain the plugin from Astoundify via our official link. Then, follow these steps to install it:
- Get the Extended Location plugin from the Astoundify website.
- Navigate to your WordPress dashboard.
- Go to Plugins > Add New.
- Click on Upload Plugin and select the downloaded file.
- Click Install Now and then Activate the plugin.
Configuring Extended Location Settings
Once installed, you need to configure the settings to ensure the feature is enabled correctly.
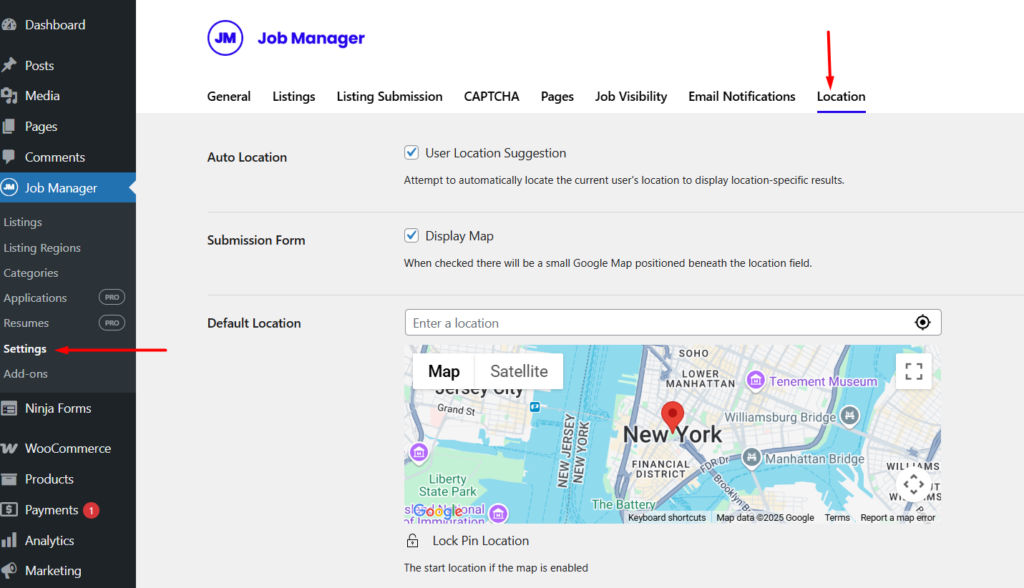
- In the WordPress dashboard, go to WP Job Manager > Job Listings > Settings.
- Click on the Location tab to access the Extended Location settings.
- Adjust the following settings based on your requirements:
- Auto Location User Suggestion:
- Enables automatic detection of the user’s location for displaying location-based results.
- Submission Form – Display Map:
- When enabled, a Google Map appears beneath the location field during listing submission.
- Default Location:
- Set a default location that will appear on all listing submission forms (both backend and frontend).
- Enter the preferred location to be displayed initially on the map.
- IP-API.com Localization:
- Provides localization for user location detection based on IP address.
- Default setting: English.
- Auto Location User Suggestion:
- Click Save Changes to apply the settings.
Using Extended Location for Listings
Adding Locations in the Backend (Admin Panel)
Admins can add or edit listings and set their location using the Extended Location feature.
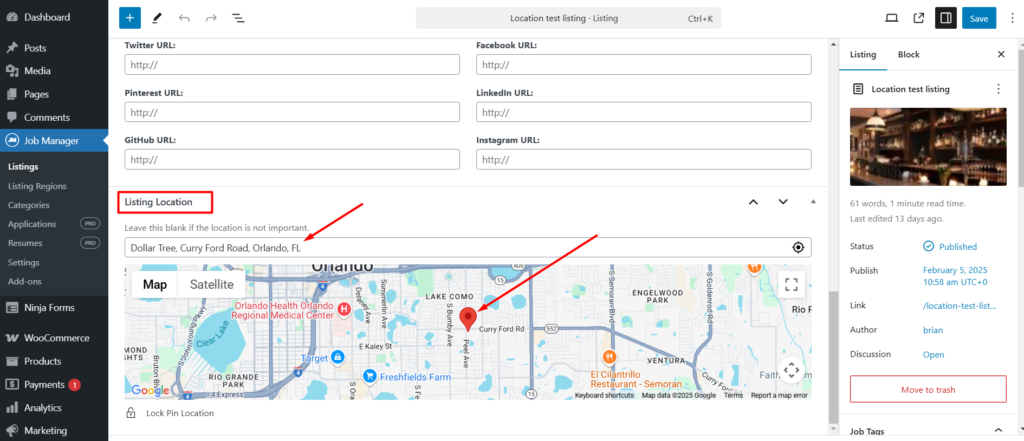
- Navigate to Job Listings > Add New Listing (or edit an existing listing).
- Scroll down to the Location field.
- If a default location is set in the settings, it will appear automatically on the map.
- To change the location, enter a full address in the Location field.
- The map will update with the pin at the specified location.
- Complete the listing details and click Publish.
Adding Locations in the Frontend (Listing Submission Page)
Listing owners can set their location when submitting a listing from the frontend.
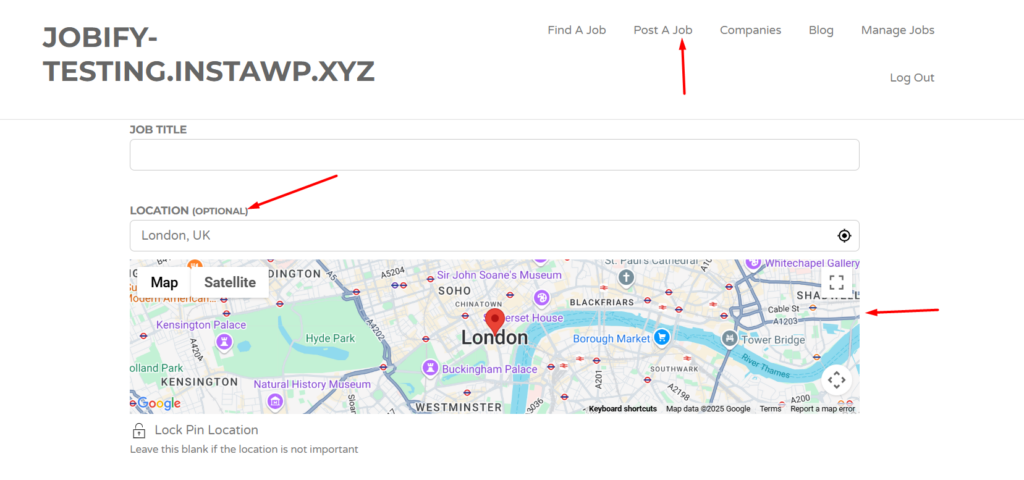
- Go to the Submit Listing/Job page on the frontend.
- Locate the Location field in the submission form.
- Enter the full address to pinpoint the location on the map.
- If a default location is set, it will be displayed automatically.
- Adjust the location as needed and complete the rest of the submission form.
- Click Submit Listing to publish.
Conclusion
The Extended Location plugin provides powerful enhancements for managing listing locations in Listify and Jobify. Whether used by an admin in the backend or a listing owner in the frontend, this feature improves user experience by displaying maps, suggesting locations, and allowing precise location entries. By properly configuring and utilizing this plugin, users can ensure accurate location representation across their listings.