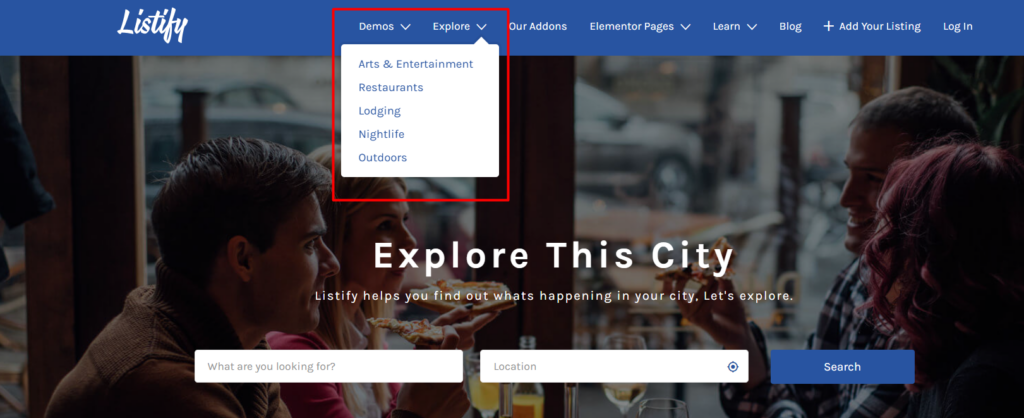
Listify supports dropdown menus (also called submenus) within the Primary, Secondary, and Tertiary navigation areas. You can create multi-level dropdowns, though we recommend keeping the structure simple with no more than 2–3 levels for usability.
Steps to Create a Dropdown Menu
- Go to Appearance > Menus in your WordPress dashboard.
- Create or select an existing menu you want to edit.
- If you don’t already have a menu, click “create a new menu”, give it a name, then click Save Menu.
- Add menu items from the left panel (Pages, Custom Links, Categories, etc.) by checking the boxes and clicking Add to Menu.
- Rearrange items to create a dropdown:
- Drag a menu item slightly to the right beneath the item you want it to appear under.
- This nesting creates a dropdown (submenu) under the top-level item.
- Repeat to add more sub-items or to create multiple levels, but avoid going deeper than 2–3 levels for best usability.

- Assign the menu to a location such as Primary, Secondary, or Tertiary under Menu Settings.
- Click Save Menu to apply your changes.
Additional Tips
- Hover effects and dropdown behavior may vary based on the theme styling.
- Use clear, short labels for submenu items to keep the navigation user-friendly.
- If dropdowns are not displaying as expected on the frontend, make sure your theme supports multi-level menus and that no conflicting CSS or plugins are affecting it.
