This integration guide will walk you through the process of adding reCAPTCHA to the registration form of the Listify theme. By following these steps, you can enhance the security of your registration form and prevent spam submissions.
Prerequisites:
- Listify theme installed and activated.
- Access to the WordPress admin dashboard.
- Add the reCAPTCHA by Astoundify plugin.
Step 1: Install and Activate the “reCAPTCHA for Listify” Plugin
- In the WordPress admin dashboard, navigate to “Plugins” > “Add New”.
- Search for the “reCAPTCHA for Listify” plugin.
- Click on “Install Now” and then “Activate” to activate the plugin.
Step 2: Obtain reCAPTCHA API Keys
- Visit the reCAPTCHA website (https://www.google.com/recaptcha/admin/create#list) and sign in using your Google account.
- Create a new reCAPTCHA v2 type for your website by clicking on the “Admin Console” button.
- Enter a label for your reCAPTCHA, such as your website name.
- Choose the reCAPTCHA v2 “I’m not a robot” checkbox.
- Add the domain(s) where your Listify website is hosted.
- Accept the reCAPTCHA terms of service and click on “Submit” to create the reCAPTCHA.
- After the creation is successful, you will obtain the Site Key and Secret Key.

Step 3a: Configure reCAPTCHA Settings in Listify
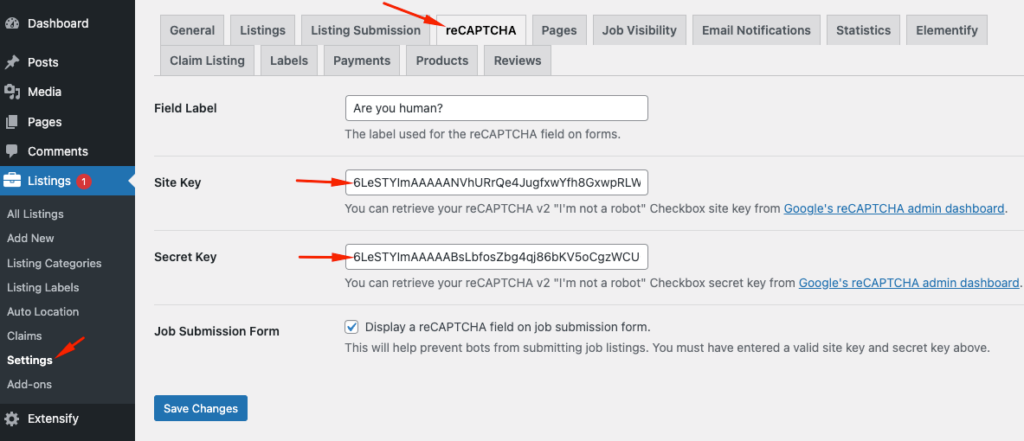
- In the WordPress admin dashboard, go to “Listings” > “Settings” > “reCAPTCHA”.
- On this page, you will find the settings related to reCAPTCHA integration with the Listify theme.
- In the Listify theme’s reCAPTCHA settings page, enter the Site Key and Secret Key obtained from the reCAPTCHA website.
- Locate the “reCAPTCHA Site Key” field and paste the Site Key.
- Locate the “reCAPTCHA Secret Key” field and paste the Secret Key.
Step 3b: Enable reCAPTCHA for the Registration Form with reCAPTCHA by Astoundify
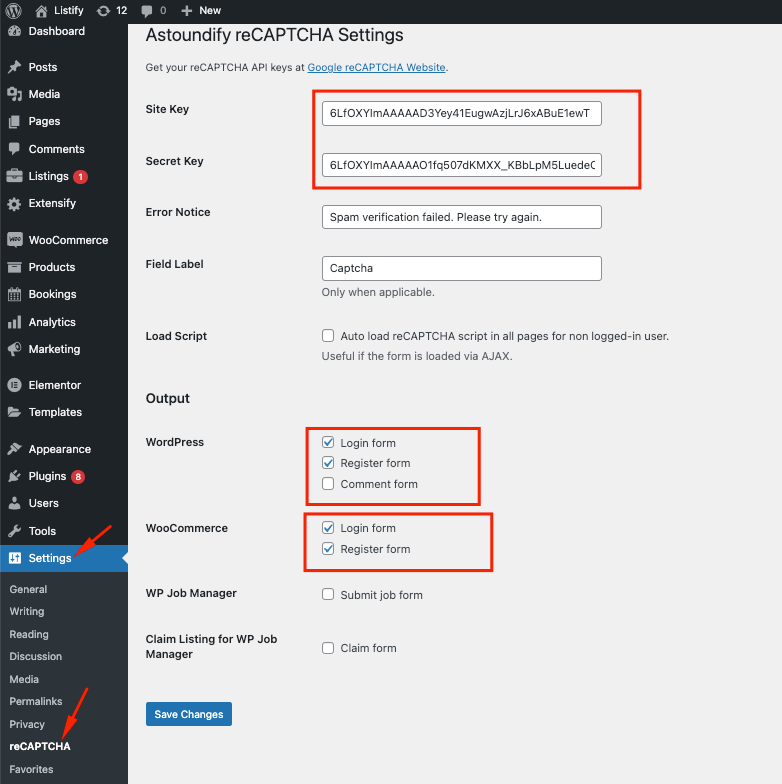
- After installing and activating the plugin head over to your WP-Admin > Settings > Recaptcha option.
- In the reCAPTCHA settings page, you need to insert the Site key and Secret Key you obtained.
- You will also find options to enable reCAPTCHA for different forms in the Listify theme. You need to enable for WooCommerce as it supports account registration in the theme. If you want to enable for admin users, you can check the options for WordPress.
- Locate the “Enable reCAPTCHA for Registration Form” option and check the box to enable reCAPTCHA for the registration form.
Step 4: Save the Settings
- Click on the “Save Changes” button to save the reCAPTCHA settings in Listify.
Congratulations! You have successfully integrated reCAPTCHA with the registration form of the Listify theme. The reCAPTCHA widget will now be displayed on the registration form, and users will need to complete the reCAPTCHA verification to submit the form successfully.