WP Job Manager – Listing Labels plugin.
Listing Labels act as the final level of classification for listings. They work alongside listing types and categories to help users narrow down their searches and identify specific features within listings.
For example, in a restaurant directory:
- Listing Types might be: Diner, Café, Bar
- Categories might be: Greek, Italian, American
- Labels might be:
- Vegan
- Gluten Free
- Accepts Credit Cards
- Waiter Service
- Dine-in Only
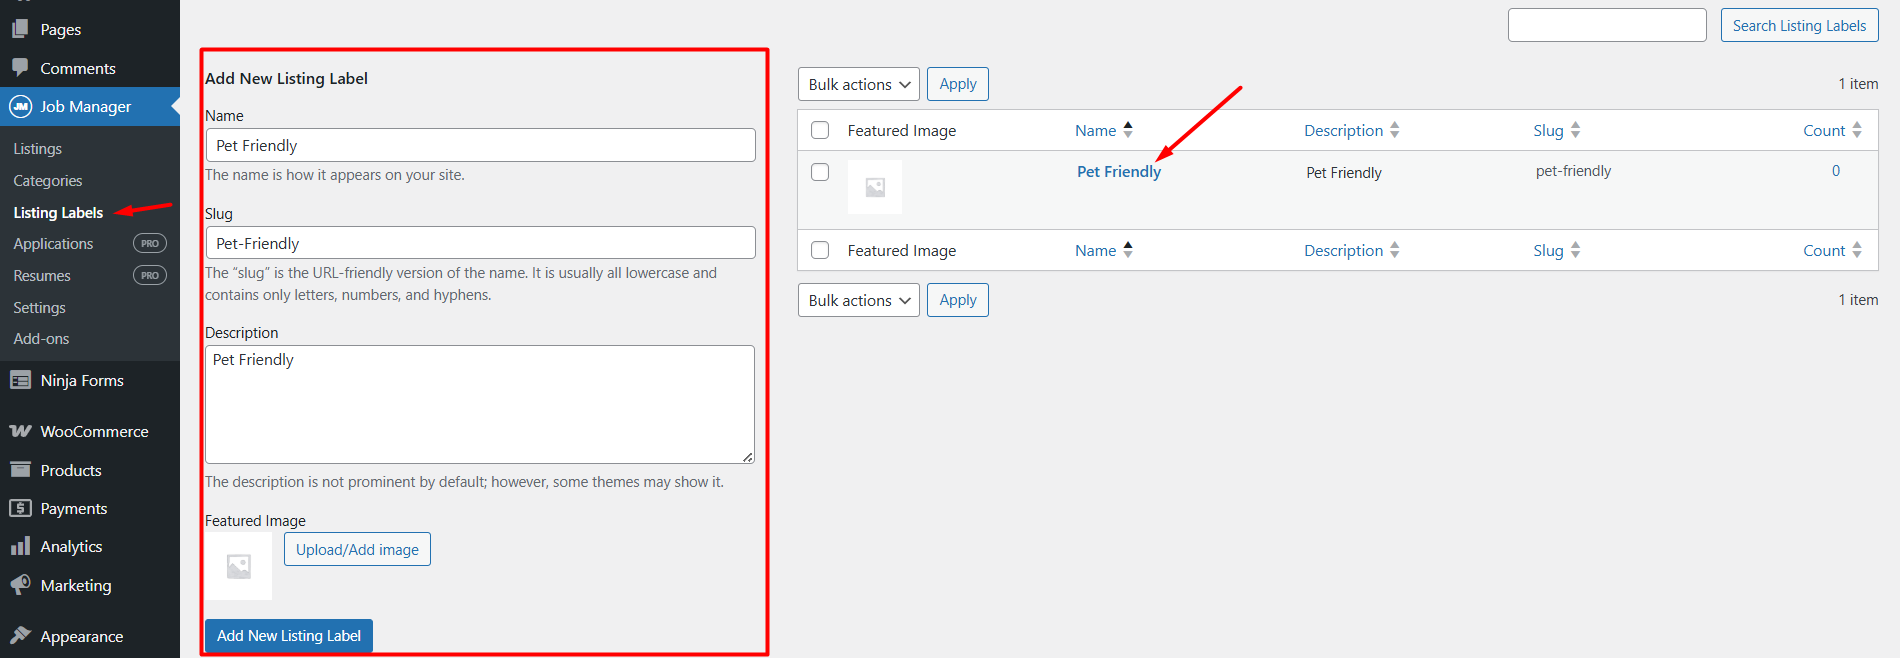
➕ Adding Listing Labels
If you did not import demo content, you will need to add your own Listing Labels manually.
- Log into your WordPress Dashboard.
- Go to Job Manager▸ Listing Labels.
- Click Add New to create a new label.
- Enter a name (e.g., “Pet Friendly”), optional description, and slug.
- Click Add New Label to save.
Listing Labels function similarly to WordPress categories or tags and can be assigned to listings individually or in bulk.
📌 Displaying Labels on the Single Listing Page
To display labels on individual listing pages, use the dedicated widget:
- Go to Appearance ▸ Widgets.
- Locate the Single Listing: Main Content widget area (or “Single {Noun}: Main Content” if you’ve renamed Listings).
- Add the Listing Labels widget to this area.
- Optionally, configure widget settings such as label title or display format.
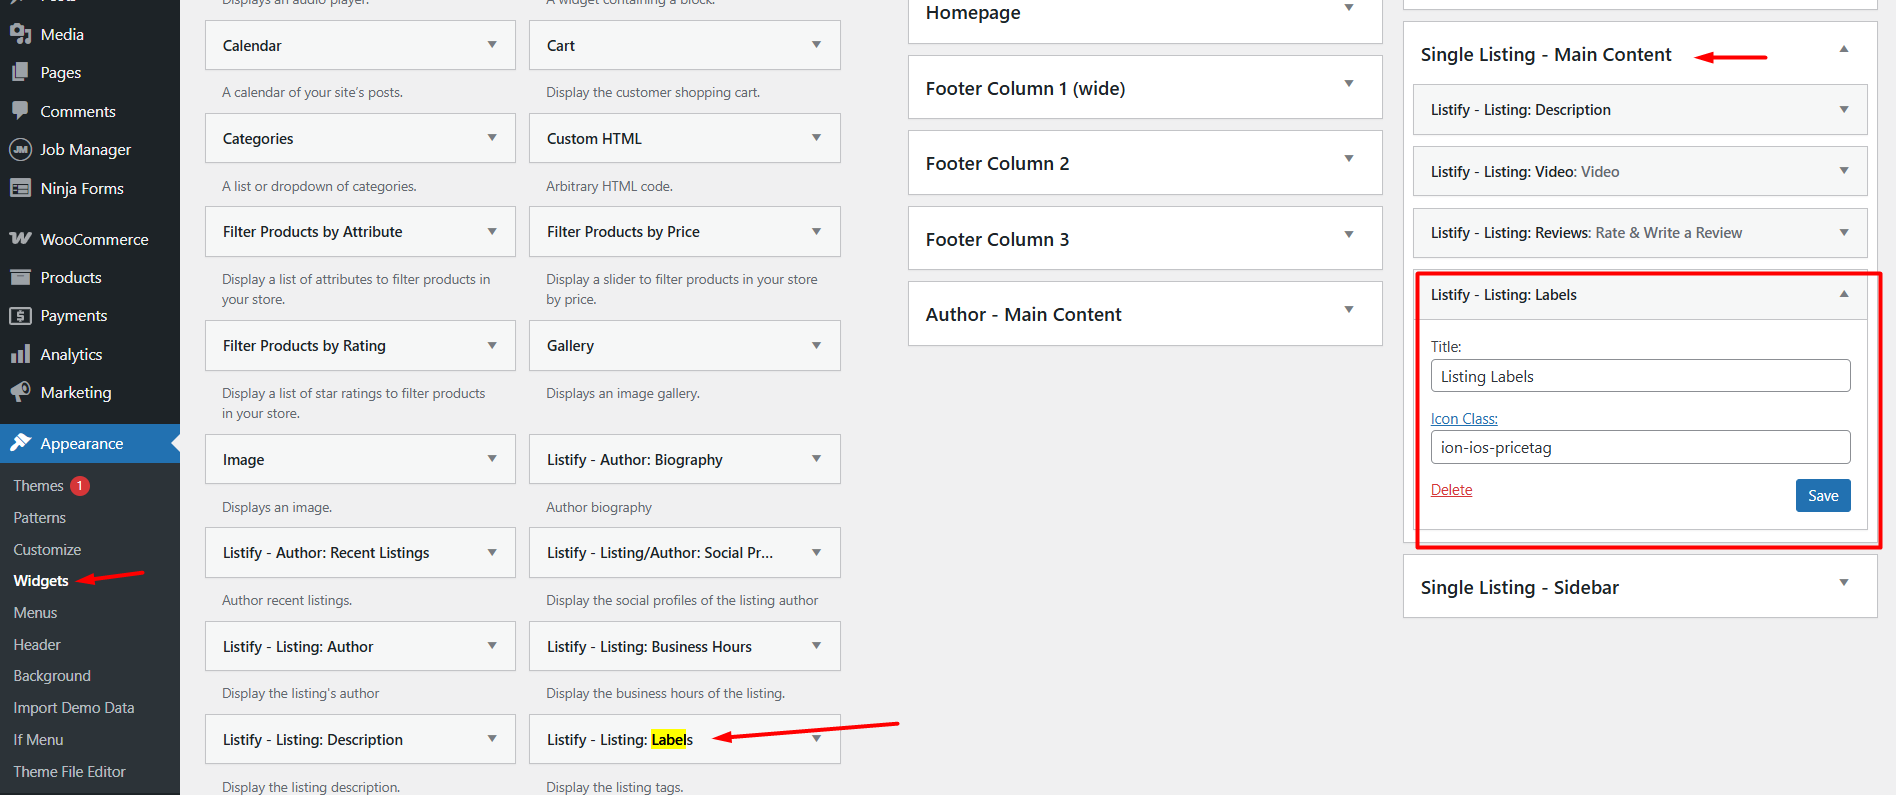
Once saved, your listing labels will appear on the listing’s frontend under the main content section.
⚙️ Using Labels for Filtering
The Listing Labels plugin includes built-in AJAX-powered filtering on listing archive pages. When users select a label, the page dynamically refreshes to show only listings that match the selected criteria—enhancing user experience and search accuracy.
📚 Further Resources
- Purchase Listing Labels Plugin
- Overview of Listing Labels
- Visit the Knowledge Base for more setup guides and help articles.