After activating the Pointify theme, you can enhance its functionality by installing both required and compatible plugins. These plugins can be easily installed and activated from the WordPress dashboard. Follow these detailed steps to unlock all the features of the Pointify theme:
Step-by-Step Guide
1. Accessing the Plugin Installation Prompt
Once you activate the Pointify theme, you will see a prompt encouraging you to install the required and compatible plugins. Alternatively, you can access them via Appearance > Install plugins section.
- Notification Bar: Look for a notification bar at the top of your WordPress admin panel that says, “Unlock Feature of Pointify: Enable all the features by setting up compatible plugins.”
- Begin Installation: Click on the link that says To see compatible plugins, click here. This link will take you to the plugin installation page where you can see a list of all the required and compatible plugins for the Pointify theme.
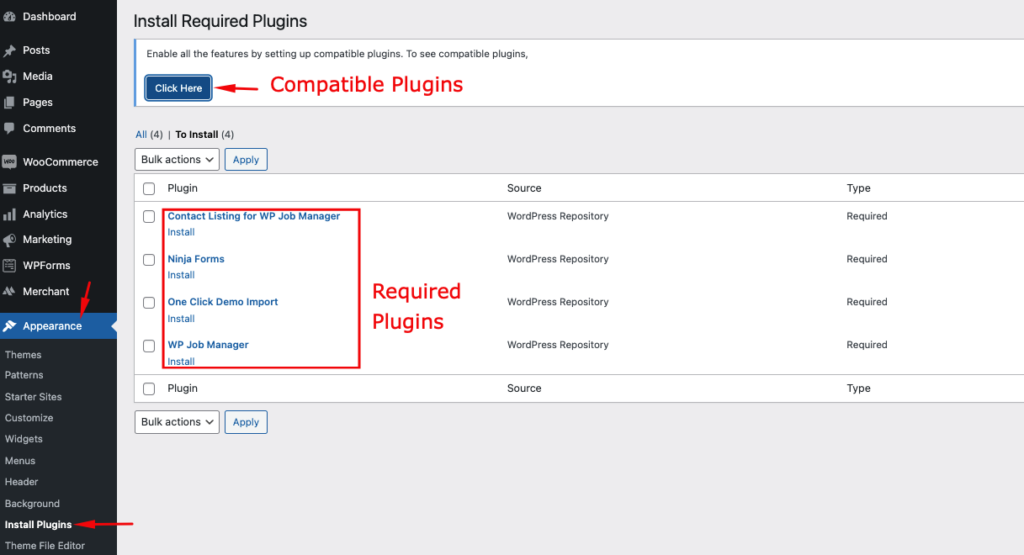
2. Selecting Plugins to Install
On the plugin installation page, you will see a list of plugins categorized under “Required” and “Compatible.”
Required Plugins
To ensure full functionality of the Pointify theme, install the following required plugins:
- Contact Listing for WP Job Manager
- Ninja Forms
- One Click Demo Import
- WP Job Manager
- Select Plugins: To install multiple plugins at once, check the box at the top of the list to select all plugins, or individually check the boxes next to the plugins you want to install.
- Bulk Actions: From the “Bulk Actions” dropdown menu, select Install and then click the Apply button. This will start the installation process for all selected plugins.
Compatible Plugins
To enhance the Pointify theme with additional features, install the following compatible plugins:
- Download Individual Plugin: You can alternatively opt to get each individual plugin by setting on the download plugin button on the screen shown here.
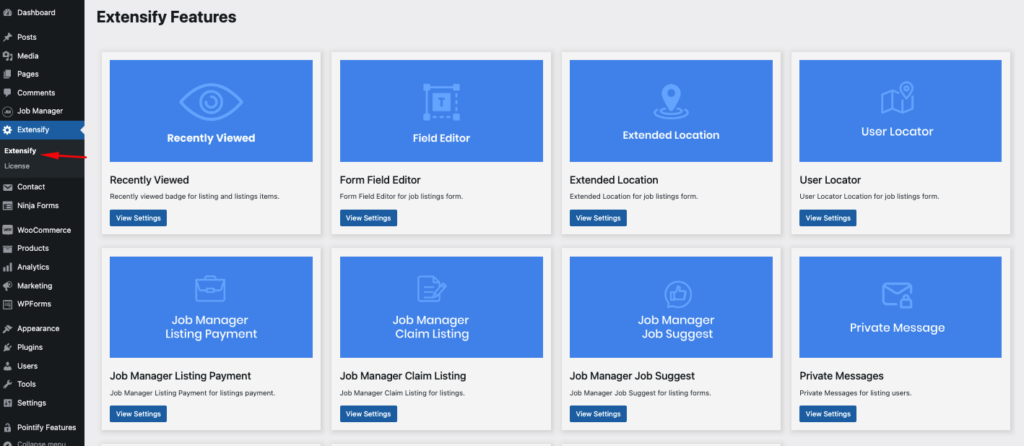
- Extensify (Purchase Plugin)- This is our Premium plugin by which customers can unlock all the paid features.
- Contact Listing for WP Job Manager (Download Plugin – FREE)
- Favorites by Astoundify (Download Plugin – FREE)
- Listing Labels for WP Job Manager (Download Plugin – FREE)
- Reviews for WP Job Manager (Download Plugin – FREE)
- Simple Registration for WooCommerce (Download Plugin – FREE)
- Predefined Regions (Download Plugin – FREE)

- Getting the Extensify Plugins: To get the compatible plugins at once, we recommend that you get the Extensify plugin from our Astoundify site here. This will include all paid features as well.
Here is the list of premium features of Extensify
- Recently Viewed
- Form Field Editor
- Extended Location
- User Locator
- Job Manager Listing Payment
- Job Manager Claim Listing
- Job Manager Job Suggest
- Private Messages
- Job Manager Products
- Job Manager Auto Location
- Elementify
3. Installing Plugins
The installation process will begin, and you will see a progress screen for each plugin as it installs.
- Installation Progress: Each plugin will show its installation status. Once all plugins are installed, you will see a confirmation message for each plugin.
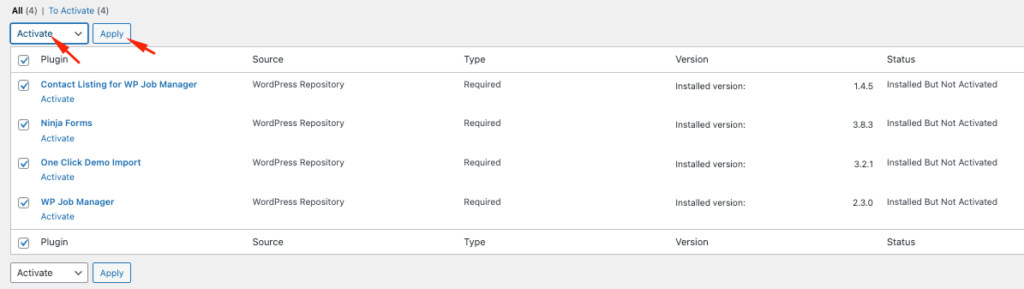
4. Activating Installed Plugins
After all the required and compatible plugins are installed, the next step is to activate them.
- Select Plugins: Go back to the plugin installation page or navigate to Plugins > Installed Plugins from your WordPress dashboard.
- Bulk Activate: Check the boxes next to the newly installed plugins or select all installed plugins.
- Activate: From the “Bulk Actions” dropdown menu, select Activate and click the Apply button. This will activate all the selected plugins.