Introduction
This guide provides detailed instructions on how to install and activate the Pointify theme on your WordPress site. Follow these steps to ensure a smooth installation process.
Installation Steps
1. Download the Pointify Theme
First, download the Pointify theme files. You can obtain the theme from the following sources:
- Author Website: Pointify Theme
- Theme Marketplace: Download from WordPress
2. Upload the Theme to WordPress
There are two methods to upload the theme: via the WordPress dashboard or using FTP.
Method 1: Upload via WordPress Dashboard
- Log in to your WordPress admin panel.
- Open your web browser and go to your WordPress admin login page (e.g., www.yourwebsite.com/wp-admin).
- Enter your username and password, then click “Log In.”
- Navigate to Appearance > Themes.
- In the left-hand menu, hover over “Appearance” and then click on “Themes.”
- Click the Add New button at the top.
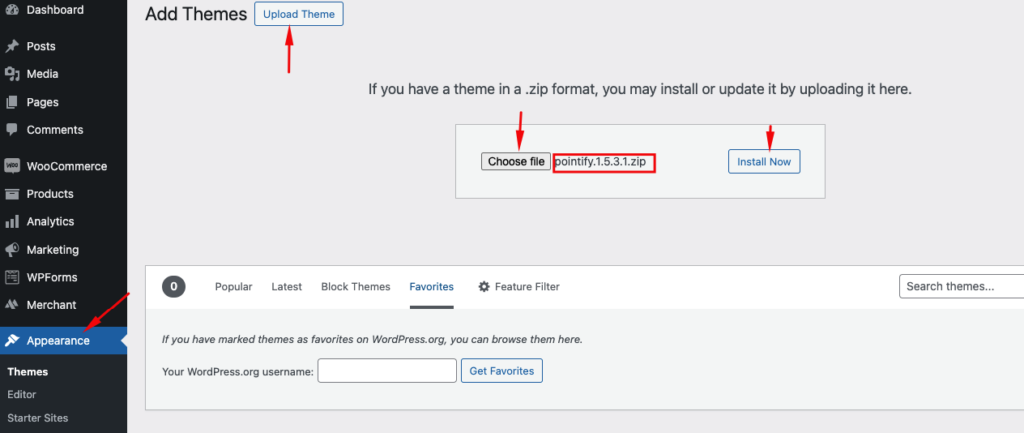
- This will take you to the “Add Themes” page.
- Click the Upload Theme button.
- This button is located at the top of the page.
- Click Choose File and select the pointify.zip file you downloaded.
- Browse your computer and select the Pointify .zip file you previously downloaded.
- Click Install Now.
- This will start the theme installation process.
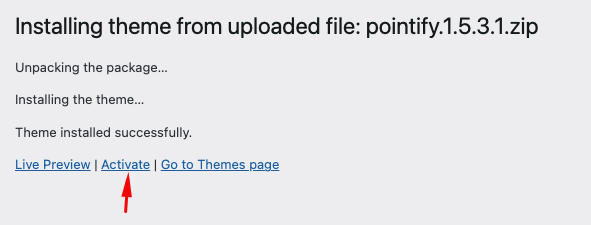
- Wait for the installation to complete.
- Once the theme is installed, you will see a success message.
Method 2: Upload via FTP
- Extract the pointify.zip file on your computer.
- Right-click the .zip file and choose “Extract All” or use a file extraction tool.
- Use an FTP client (like FileZilla) to connect to your server.
- Open your FTP client and enter your server’s FTP credentials (host, username, password, port).
- Navigate to the /wp-content/themes/ directory.
- This directory contains all the themes installed on your WordPress site.
- Upload the extracted Pointify folder to the /wp-content/themes/ directory.
- Drag and drop the extracted Pointify theme folder from your computer to the /wp-content/themes/ directory on your server.
- Wait for the upload to complete.
- Ensure all files are transferred successfully.
3. Activate the Theme
Once the theme is uploaded, you need to activate it.
- Navigate to Appearance > Themes in your WordPress admin panel.
- In the left-hand menu, hover over “Appearance” and then click on “Themes.”
- Locate the Pointify theme in the list.
- You should see Pointify among the available themes.
- Click the Activate button.
- This will activate the Pointify theme on your WordPress site.
Conclusion
Congratulations! You have successfully installed and activated the Pointify theme on your WordPress site. You can now begin customizing your theme to create a stunning and modern website.