- Listing Payments – Enables monetization and the creation of listing packages.
- WooCommerce – Required to handle payments and product management.
Once these plugins are installed and set up, you can create listing packages as WooCommerce products and add badges to them that highlight or promote specific plans (e.g., “Best Value”, “Popular”, “Free Trial”).
🎯 How to Add a Badge to a Package
- From your WordPress Dashboard, go to Products.
- Click to edit the product (package) you want to add a badge to.
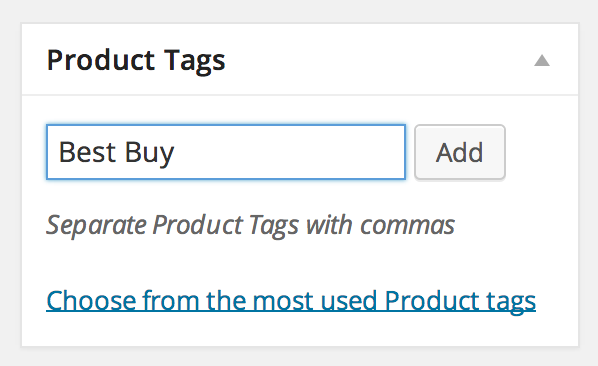
- In the right-hand panel, locate the Product Tags field.
- Add your desired badge label as a tag (e.g.,
Popular,Best Value,Featured). - Click Update or Publish to save your changes.
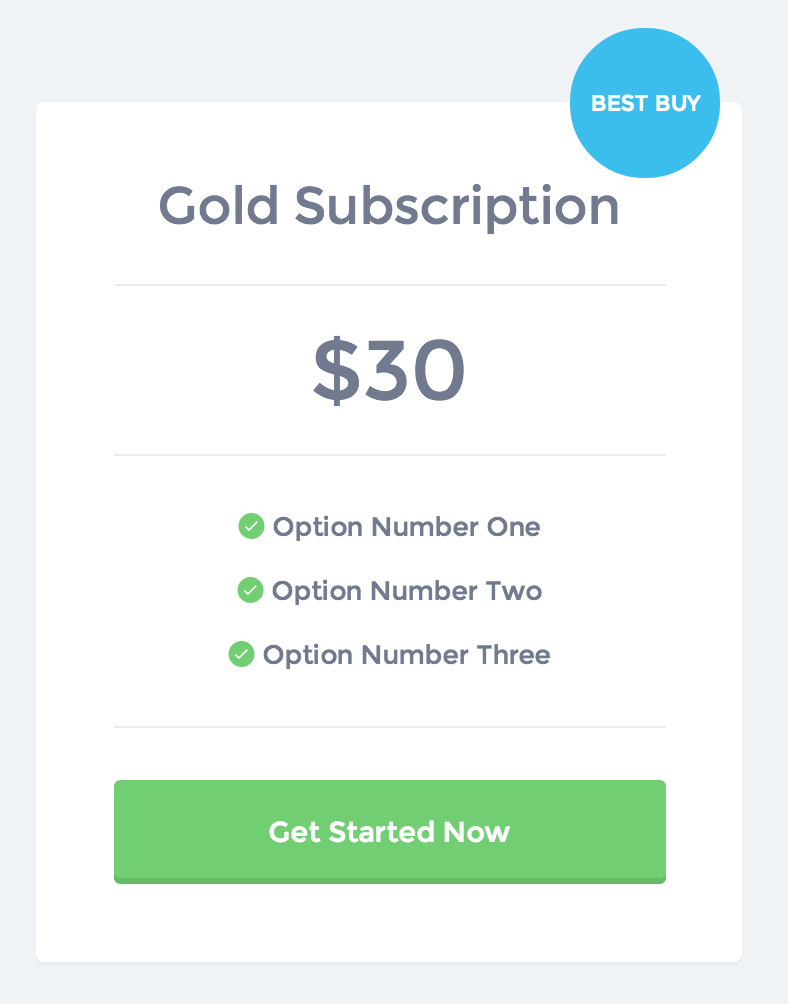
The tag you assign will automatically appear as a badge above the package in the frontend pricing table (when using the Plans and Pricing or Plans and Pricing (Stacked) page templates).
💡 Tips
- You can use different tags for different packages to make each one stand out.
- The badge styling is handled by your theme (Listify) and will inherit its default badge design. You can customize this further via CSS if needed.
- Only one badge will be displayed per package, even if multiple tags are added. The first tag is used as the badge label.
Need help creating your packages or customizing your pricing display? Visit our Knowledge Base or Contact Support.