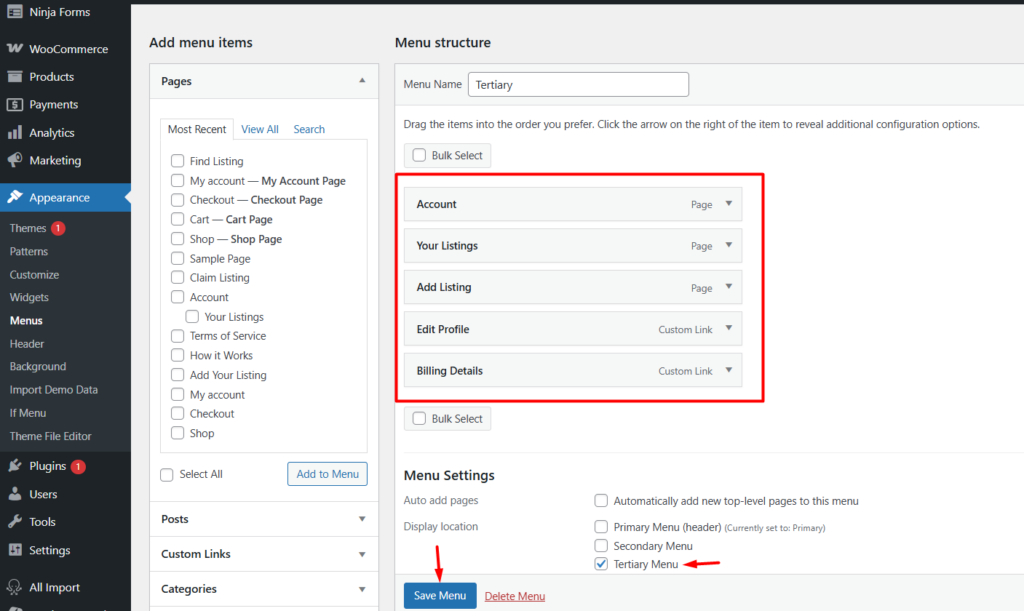
The Tertiary Menu appears beneath the page title on all pages associated with the My Account area. This includes the user dashboard and all other account-related pages.
Creating the Tertiary Menu
If you do not already have a tertiary menu created, follow these steps:
- Go to Appearance > Menus in your WordPress dashboard.
- Click the “create a new menu” link.
- Give your menu a name (e.g., “Tertiary Menu”) and click the Save Menu button.
Adding Items
After creating the menu:
- Choose items like Pages, Custom Links, Categories, etc., from the left-hand column to add to your menu.
- If you are using custom post types or taxonomies and don’t see them, open the “Screen Options” at the top right and check the appropriate options to display them.
- Once added, drag and drop the items to organize them.
- You can also nest items by dragging them slightly to the right to create submenu items.
- Click each item to edit its label and other properties if needed.
- Click Save Menu once your structure is finalized.
Assign the Menu to the Tertiary Location
Under Menu Settings at the bottom of the menu screen, check:
- Tertiary Menu
Then click Save Menu to apply the menu to the Tertiary display area on My Account pages.
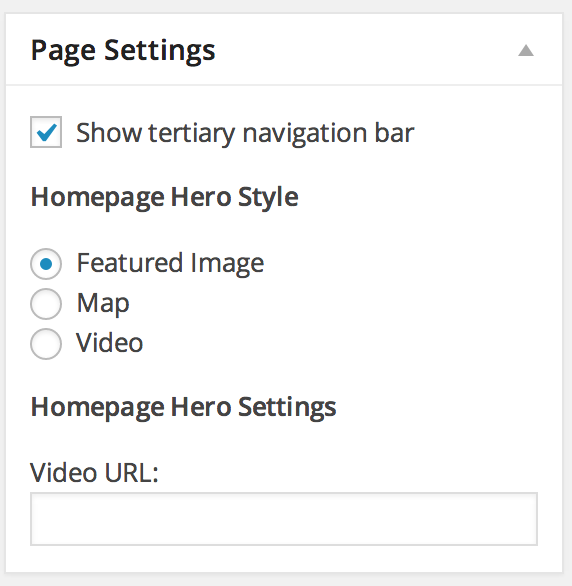
Enable Tertiary Navigation on Pages
To enable the tertiary menu on individual pages:
- Edit any standard WordPress page that supports account functionality.
- In the right-hand sidebar, locate the Page Settings panel.
- Check the option labeled “Enable tertiary navigation”.
- Update or publish the page.