Creating an online course is one of the best ways to build an engaging community within your website.
With the Coursify theme, this is made easy in WordPress through a couple of steps to create a coarse
The theme uses an inbuilt learning management system (LMS) that helps manage your online courses on the frontend and backend of your WordPress site.
Let’s take a look at our step-by-step guide on how to create an online course website in WordPress.
Step 1: Access the Listings Post Type
Upon installing the theme and the required WP Job Manager plugin, it creates a post type named as listings/Course Listings where you can add a new course and include new taxonomies, i.e categories, types e.t.c.
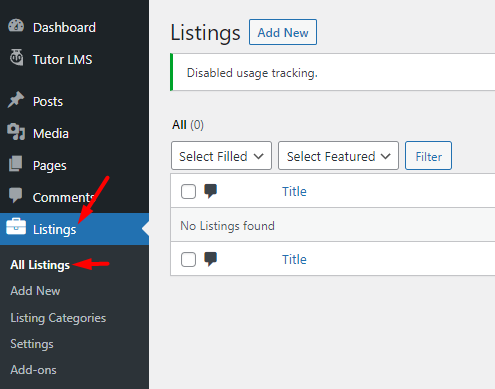
Step 2: Select Add New Course Listings
Within the Listings post type menu, you need to click on the Add New link to start the creation process of your course.
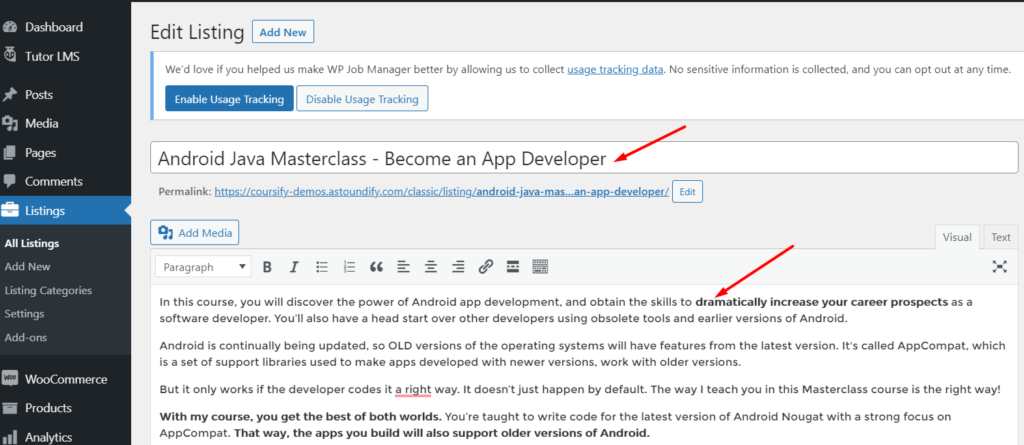
Next ensure that you give a New Title and Description to your course here. This is essential for your users to be able to identify it while performing searches.
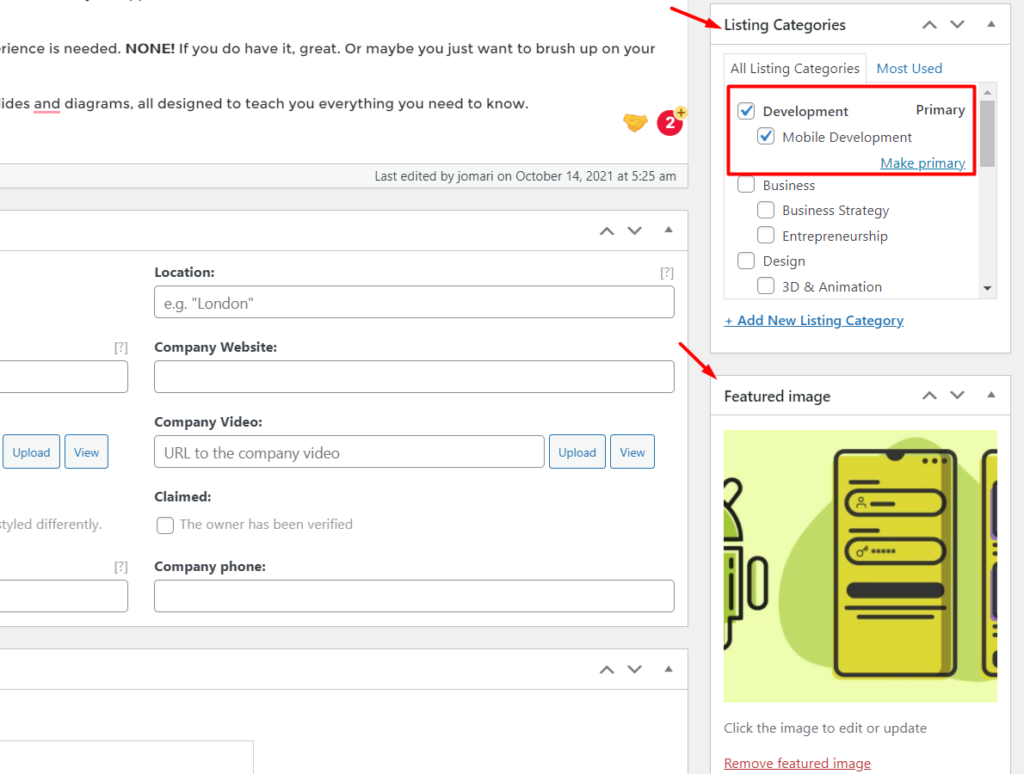
Step 3 Assign Course Taxonomies & Image
Here, you can select or add the respective taxonomies of your course. By taxonomies, usually they may include categories and tags. You may add others depending on the plugins you install on your site.
On the bottom of the right section you can as well assign the featured image of the course you are creating.
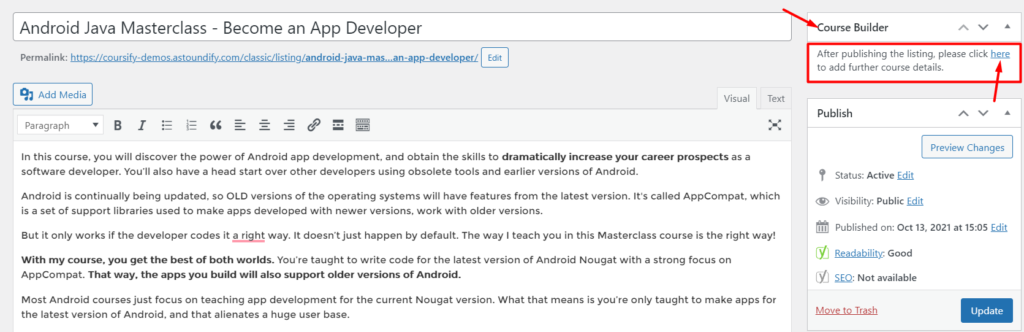
Step 4: Publish Listing and Add Course Details
Once the above steps are done you can go ahead and publish the listing.
After the publishing is done it will prompt you to add the Course deatils at the Course Builder section on the top. Thus go ahead and click the link “here” in order to be redirected to the course details page. This should redirect your to the LMS post type.
Step 5 Adding Course Details via Tutor LMS
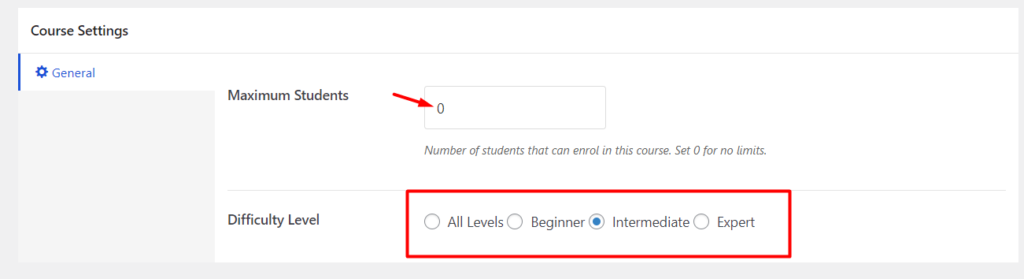
Within the LMS post which you are redirected to you need to head over course settings [just below the description part].
Here you can select the maximum number of students that can enrol in that course. In case you set 0 there will be no limits.
Next you can select the difficulty level of the course amongest [All Levels, Beginner, Intermediate, and Expert].
Step 6: Ensure Product/Listing is Linked to the Course
Just before this step you can opt to add the Except of your coarse and add the SEO data if you have installed Yoast.
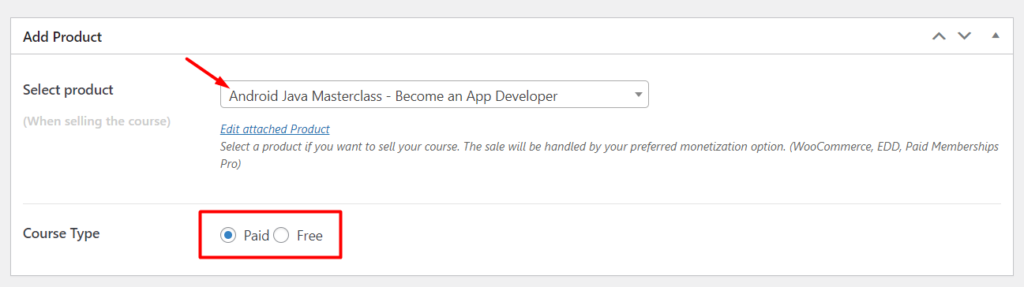
When it comes to linking the product, make sure that the Listing you created in step 2 is chosen here.
Once done, choose the if you wish the course type to be “Paid” or “Free“.
Step 7: Adding Course Topics & Lessons
In this section, you have the course builder which helps you to add the topics of the course you create. You simply have to hit the “Add New Topic” button.
Then add the topic title which is displayed publicly wherever required. Each topic may contain one or more lessons, quiz and assignments.
Then include the Topic Summary. The idea of a summary is a short text to prepare students for the activities within the topic or week. Here is a screenshot of this:
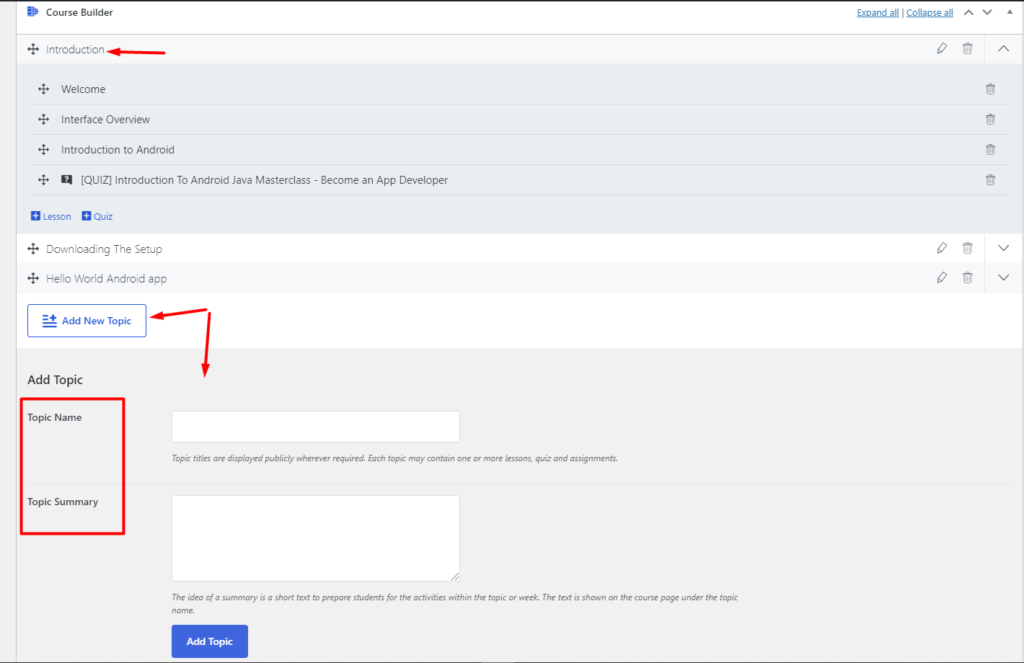
When it comes to adding the lessons of quizes, you need to select the dropdown and then either clicck on the Lesson or quiz add button as shown.

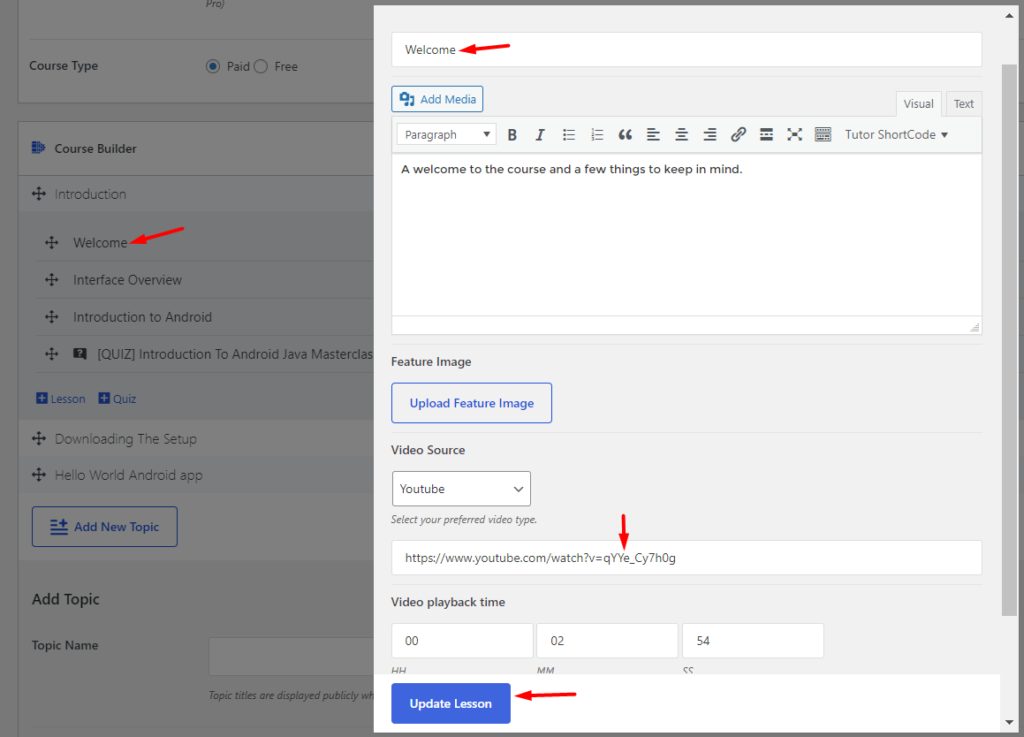
While adding the lessons be sure to include or fulfill all the relevant fields that include lesson title, description, featured image, then choose a video source and insert your video and if you want you can as well add the video playback time.
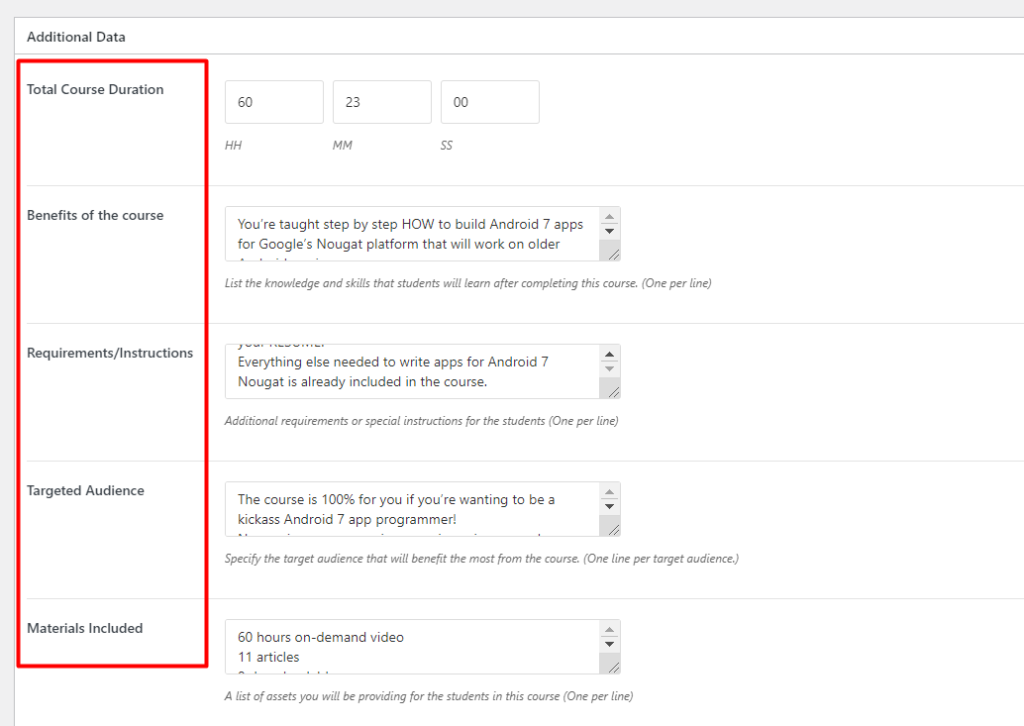
Step 8: Additional Data Section
Here you can add more information about your course – more of metadata, which includes the estimated time the cousrse will take to be completed [Total Course Duration].
The rest of the data does includes the knowledge and skills that students will learn after completing this course [Benefits of the course], additional requirements or special instructions for the students, the target audience that will benefit the most from the course, and finally some of the assets you will be providing for the students in this course.
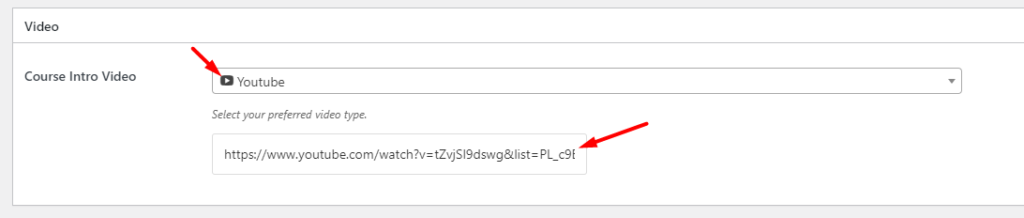
Step 9:Adding a Course Video
The other step includes adding a video for your course. This video can be used to market your course as well or briefly summarise what your course entails.
Simply choose the source of your video like Youtube for example, then include its respective video URL.
Once you are done with all these sections be sure to select the respective course category as well and then you can hit on the Publish button to make your course available on the frontend.
You can view and axample of how this appears on the frontend through our demo course listing here.