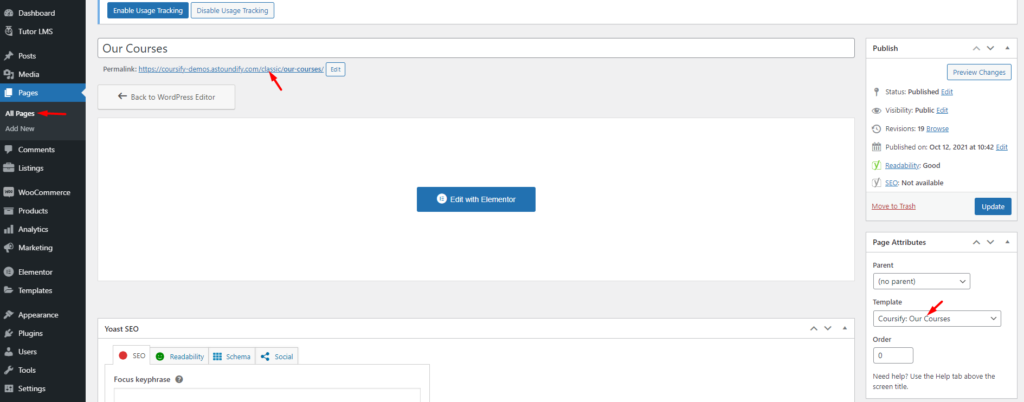
When creating the Coursify list page of your theme, it can be done in a similar manner as we did on the Coursify Homepage via the Elementor Page Builder.
Therefore I would recommend that, before proceeding further, ensure that you have the Elementor plugin installed within your site.
To achieve a similar setup as in the demo page here, please follow the steps as shown:
Step 1: Add the Elementor Template
Usually, upon download, the theme does come with the homepage Elementor template within the package.
Therefore you need to extract the theme and import the elementor-courses.json file to your Elemtor templates under Templates > Saved Templates > Import Templates.

This should then appear within the saved templates of Elementor.
Step 2: Edit Your Homepage
In this section, you should edit the homepage to assign the correct page attributes like the template to be used.
Therefore under Page Attributes set the template to Coursify: Our Courses. Then publish or update your page to continue to the next step.

Step 3: Edit Page With Elementor and Add Template
In the next step, you should hit the “Edit With Elementor” button [as shown above] then on landing on the page, select the template folder icon to add the template.
This opens a pop-up window, you just need to access my templates tab to find the template you imported in step 1.

Next, be sure to make the necessary changes you wish on the course’s page such as changing/adding new images to the page via Elementor Elements. Once done, save the changes made on the Elementor page and you can view your page on the frontend.
