WP Job Manager is a powerful plugin that enables users to create and manage job listings on their WordPress site with the Listify theme. To monetize the site and offer a paid listing feature, the Listing Payments plugin can be used along with the free WooCommerce plugin to create a listing package. Here are the steps to create a pricing package with these plugins:
Creating a Listing Payment Package:
Step 1: Purchase and Install Listing Payments and WooCommerce Plugins
Before you can create a listing package, you need to have the Listing Payments plugin and the WooCommerce plugin installed and activated on your WordPress site. You can purchase the Listing Payments plugin from the Astoundify addon link above.
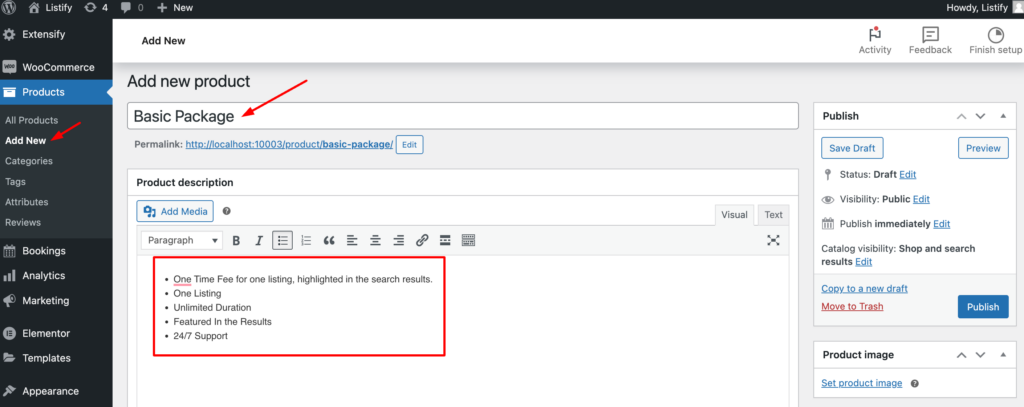
Step 2: Create a New Product
To create a listing package for users to purchase, go to “Products” and click “Add New” in the WordPress menu. This will take you to the “Add New Product” page where you can set up the details of the package. In this page, create the name of your package and add the details to offer in your listing package in list format as shown below:
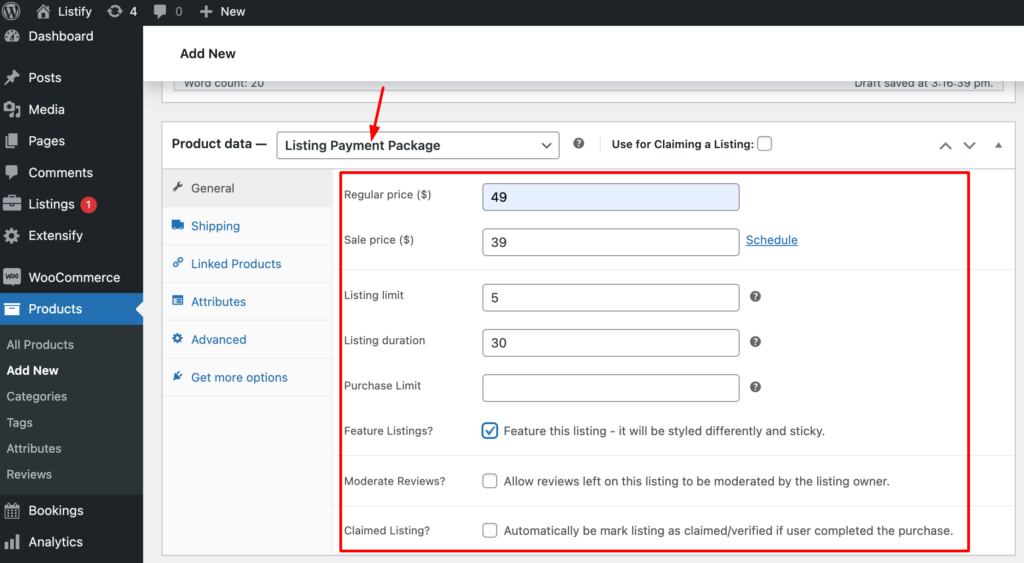
Step 3: Set Product Type to “Listing Payment Package”.
Scroll down to the product data on the “Add New Product” page, and select “Listing Payment Package” as the product type from the dropdown menu. This will enable the specific features required to create a listing package.
Step 4: Set Package Details
Once you have selected “Listing Payment Package” as the product type, you can set the price, number of listings allowed, duration, and whether or not the listings will be featured. These details can be set in the “Product Data” section of the page.
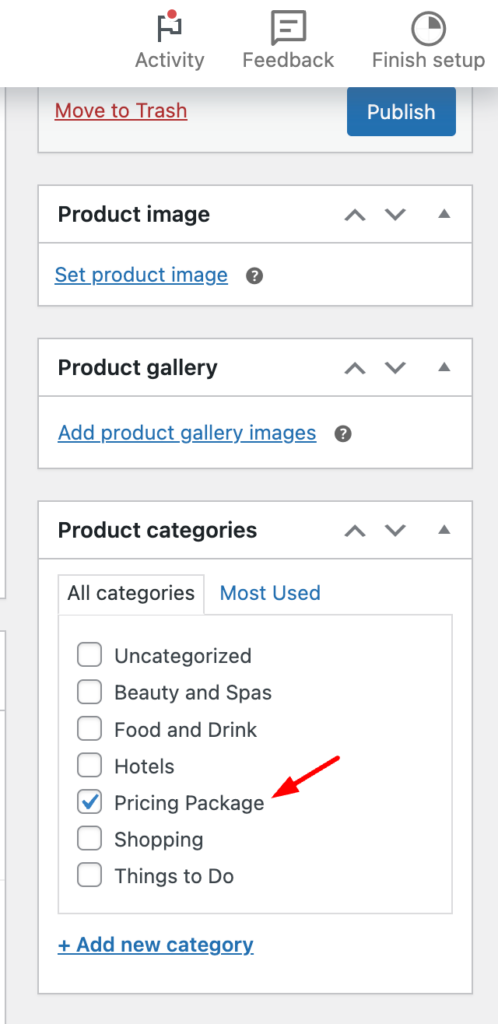
Step 5: Set the Product Image & Category
Within the right sidebar section you can consider adding a product image for the package and also set a product category to mark it as a pricing package. [Please note that this is optional]
Step 6: Publish the Listing Package
After setting up the package details, click the “Publish” button to make the package available for purchase on your site.
Creating a Listing Payment Package Subscription:
If you want to offer subscription-based listing packages, you will need to use both Listing Payments and WooCommerce Subscriptions plugins. Here are the additional steps to create a subscription-based listing package:
Step 1: Purchase and Install Listing Payments, WooCommerce, and WooCommerce Subscriptions Plugins
To offer subscription-based listing packages, you will need to have the Listing Payments, WooCommerce, and WooCommerce Subscriptions plugins installed and activated on your WordPress site. You can purchase the WooCommerce Subscriptions plugin from the WooCommerce website.
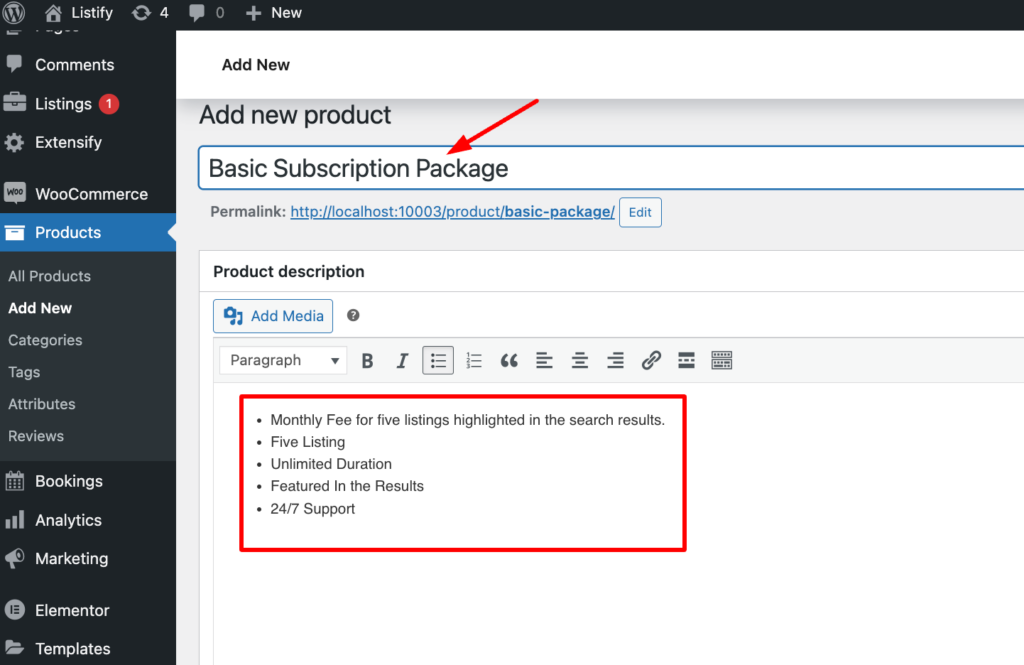
Step 2: Create a New Product
To create a subscription-based listing package, go to “Products” and click “Add New” in the WordPress menu. This will take you to the “Add New Product” page where you can set up the details of the package. Similarly in this page, create the name of your subscription package and add the details to offer in your listing package in list format as shown below:
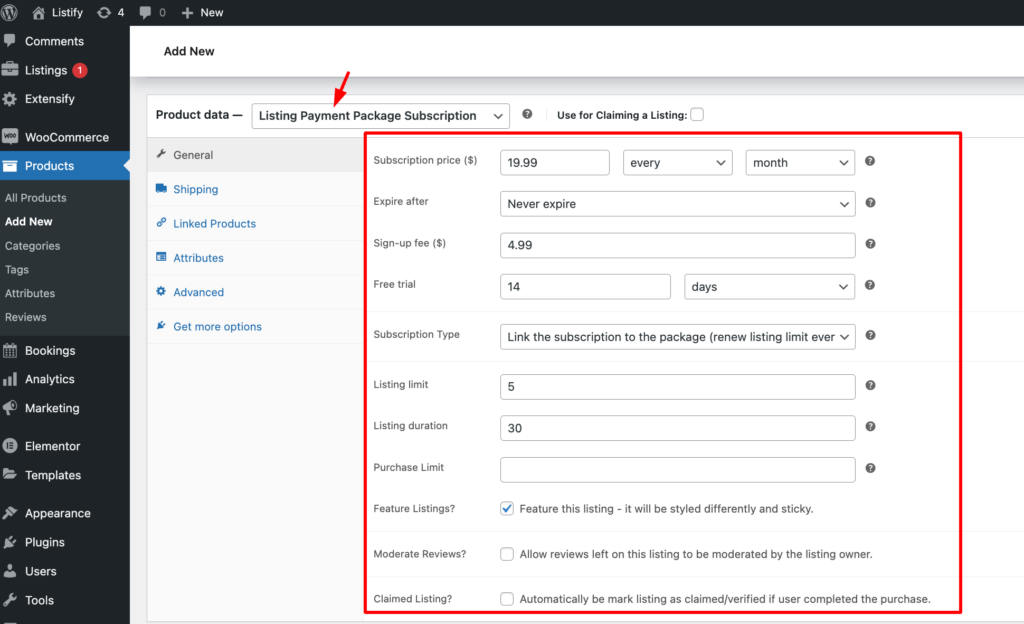
Step 3: Set Product Type to “Listing Payment Package Subscription”
On the “Add New Product” page, select “Listing Payment Package Subscription” as the product type from the dropdown menu. This will enable the specific features required to create a subscription-based listing package.
Step 4: Set Subscription Details
Once you have selected “Listing Payment Package Subscription” as the product type, you can set the billing interval (e.g. monthly, yearly), trial period, and other subscription details. These can be set in the “Subscription” section of the page.
Step 5: Set Package Details
After setting up the subscription details, you can set the price, number of listings allowed, duration, and whether or not the listings will be featured. These details can be set in the “Product Data” section of the page.
Step 6: Publish the Listing Package Subscription
After setting up the package details and subscription details, click the “Publish” button to make the subscription package available for purchase on your site.
With these steps, users can purchase a normal listing package and a subscription-based listing package on your site. The listing will be live on the site for the duration specified in the package, and the user will have access to the number of listings specified in the package. Similalry the subscription will automatically renew at the billing interval specified in the package. Users can cancel their subscription at any time through their WooCommerce account.
Creating listing packages and listing package subscriptions is a great way to monetize your listing site and offer valuable services to users.