With the newly released demo skin that houses a little different styling to the previous demos, you will be able to now set it as your default look and feel of your site.
There are two ways to which you can achieve this change either by doing the demo import or by using the theme’s style kit.
Using Demo Import Process
To achieve this you just have to head over to the Theme’s Get Started page where you first installed your first demo.
The process of switching to a new skin is more or less the same as the one for importing the demo once you install the theme.
In case you are not familiar with the demo importation process, feel free to check out this documentation page here.
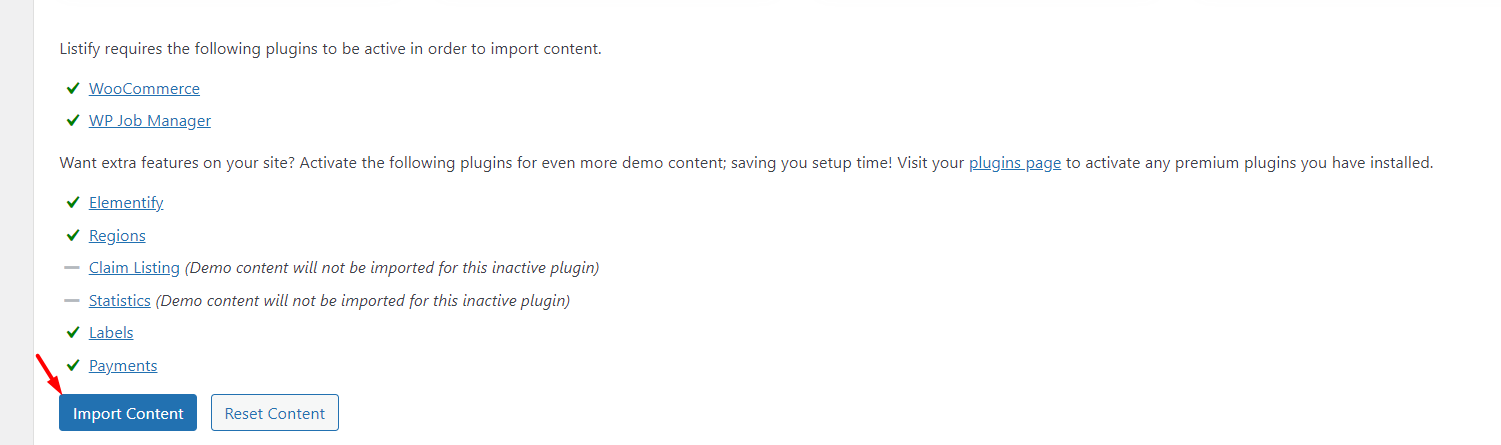
In the Get Started page, under the “Choose Site Content” you will now notice the addition of the vintage skin as you can see in this screenshot:

You simply need to select that “Modern Vintage” skin and make sure that all the required plugins listed below it are installed. Kindly do note that if you do not install one of the required plugins the demo to that plugin will not be imported.
Once all that is done you just have to hit the “Import Content” button for the vintage skin demo to be imported.
Using the Theme’s Style Kit
This appears to be the easier way to achieve all this process but it is not comprehensive when it comes to the actual styling which you opt for.
According to the description of the style kit in our guide, it adjusts multiple customization options at once.
To access the style kit head over to your site’s admin > Appearance > Customization and select the “Style Kit” option.

In this section, you can randomly select the style kit you want to apply, be it classic or vintage.
Do note that some styling may not change such as the background colors of some sections.