Appointify allows you to share your calendar and have your funnel start by others planning appointments on top of it – with their own Google calendar authorized!
Create a Google App for Appointify
To use the Appointify plugin and read events from your public Google Calendars you’ll need to create a Google APP Credential and save it within your plugin settings.
Here are step-by-step instructions to create and save a Google APP Credential :
- Navigate to the Google Developers Console.
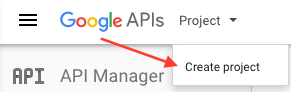
- From the top Project menu select Create project.
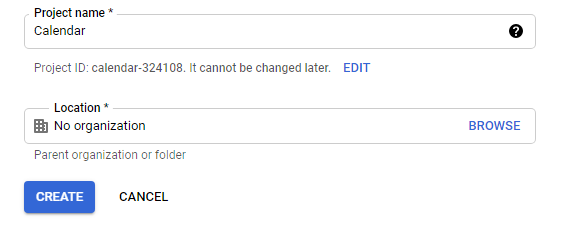
- Give your project a name, let say “Calendar” then click Create.
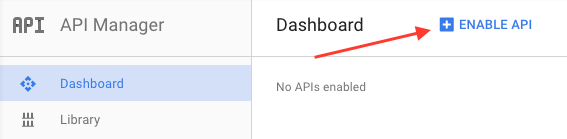
- From the Google Developers Console Dashboard select Enable API. If you don’t see this, select API Manager from the top-left “hamburger” menu.
- Under Google Apps APIs, select Calendar API. Then click Click Enable.
- Before you can create an API key under the Credentials tab, you will need to configure your oAuth consent screen:


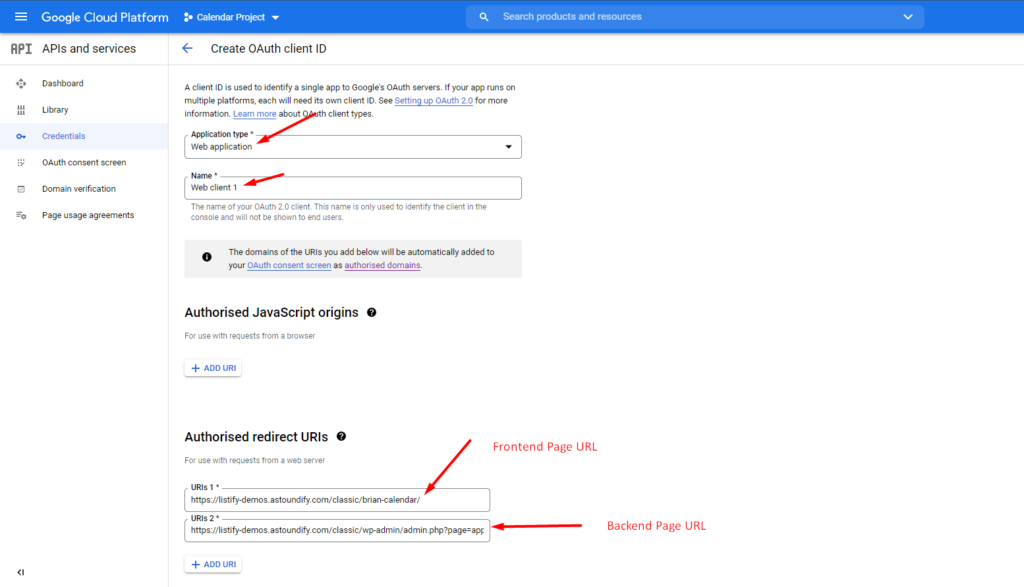
On the next screen under the application type choose “Web Application” and assign it a name. Then scroll down to the Authorised redirect URIs.
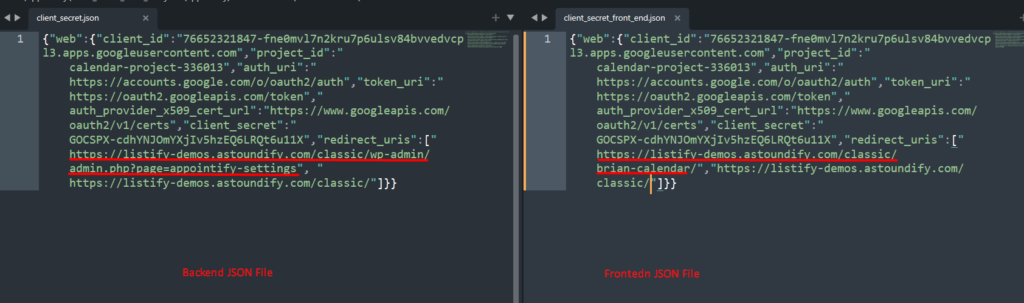
In this section, you should add two URLs, that is, the frontend and backend URL. The frontend URL should be the page you have assigned the Appointify Calendar to display. This is the same page that has the shortcode as: [appontify_frontend]. This should be something like this: https://yourdomain.com/yourcalendar/
On the other hand, the backend URL should be the settings page of the Appointify settings. Thus this should be something like: http://yourdomain.com/wp-admin/admin.php?page=appointify-settings.
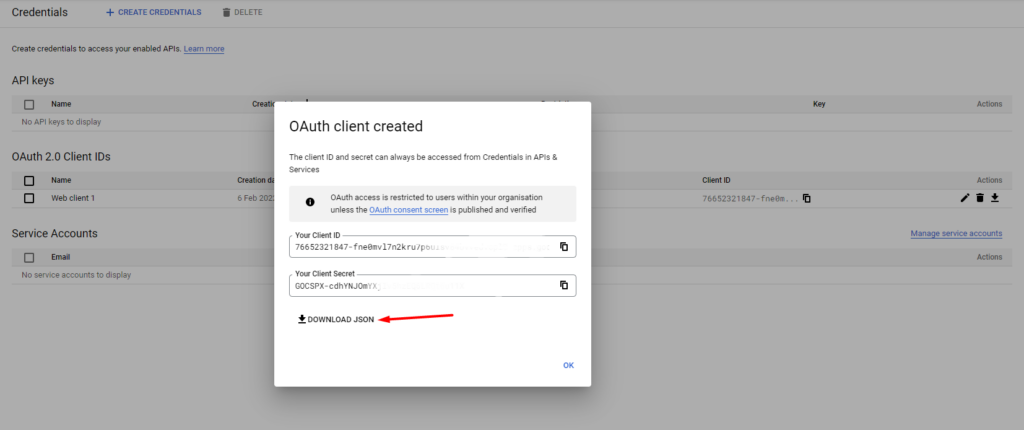
Once done please make sure you click on the “Create” button to generate your OAuth client consent credentials.
When this is done it will present you an option to download the JSON file that contains these URLs and the client ID plus Client Secret keys. Fo this section simply click on the Download JSON file option.
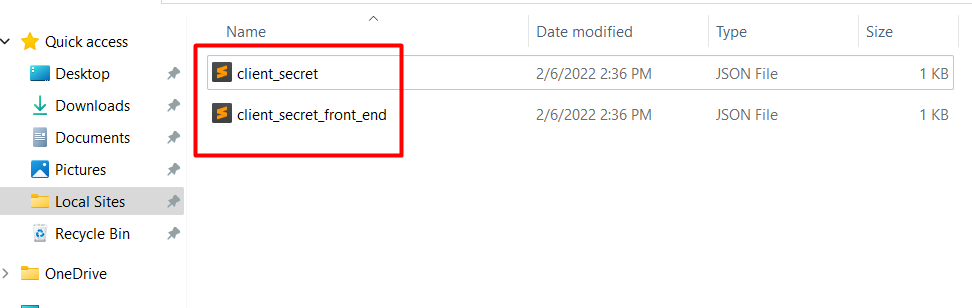
Upon downloading the JSON file then you need to head over to the folder that the JSON has been downloaded and duplicate the file or simply make a copy of it.
The first file should represent the frontend JSON file while the second should represent the backend JSON file. Therefore to bring a distinction between the two you would need to rename the files based on these differences. Ths, label the frontend file as: client_secret_front_end.json whereas label the backend file as client_secret.json.
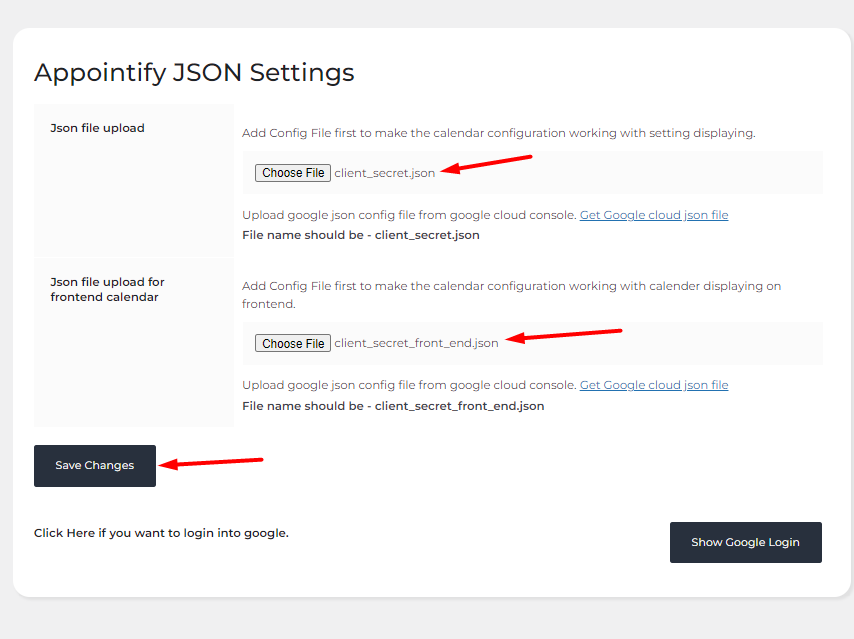
Once that is done you should head over to set these files on your Appointify Settings within your site.
So head over to Appointify > Settings and upload them and in this interface, there will be 2 files one for the frontend and one for the backend. One thing that needs to be taken care that the file name should be the same as mentioned like for backend client_secret.json and for frontend client_secret_front_end.json. Once uploaded be sure to hit the “save changes” button and this should then show if the data has been inserted successfully or not.
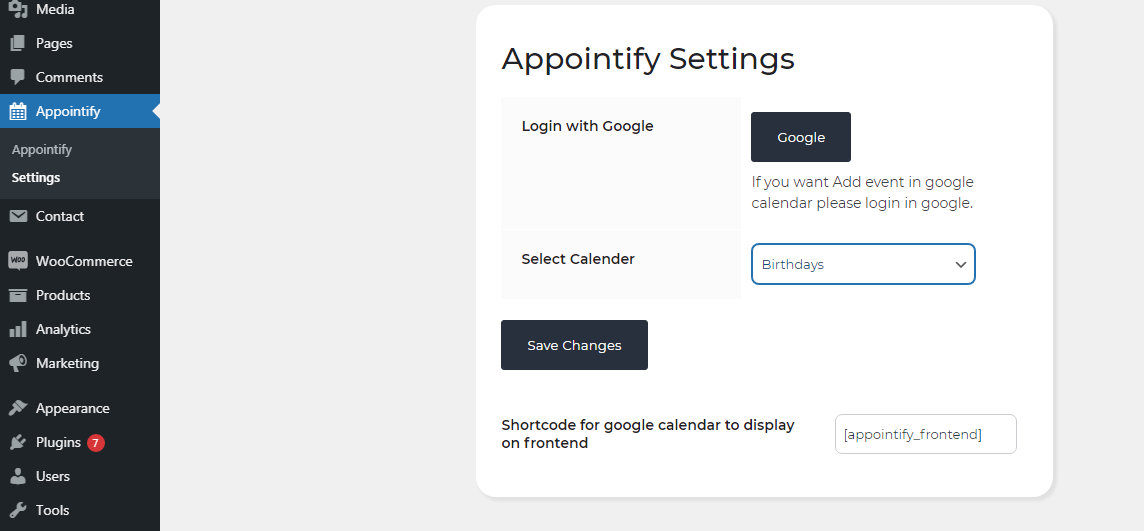
On the next page you would then need to login with Google to connect your site with the Google Calendar.
Then login from backend to the Google account allows the Google setting to access the site and then after successful login, you will get all the list of your calendar of which account you got logged in. Then you will get a list of the calendar in the dropdown after successful login.

After successful login one more section will get displayed which is the shortcode of the calendar to get displayed with the calendar and events in front so copy that shortcode and place it in the page on front end. Do make sure the url of the front end page should be same that is set in the cloud console and in the json file.
Then login from backend to the Google account allows the Google setting to access the site of ours and then after successfully login you will get all the list of your calendar of which account you got logged in. Then you will get a list of the calendar in the dropdown after successful login.
After successful login, one more section will get displayed which is the shortcode of the calendar to get displayed with the calendar and events in front so copy that shortcode and place it on the page on the front end. Do make sure the URL of the front end page should be the same that is set in the cloud console and in the JSON file.
Placing the shortcode on the page the calendar will load with the events.

Then to have other account events get login with the frontend interface with google then select the calendar whose event you want to check it will get displayed.